TL;DR: A two-node Proxmox setup powers my home lab. One node runs all my services and experiments, the other acts as a NAS. I keep things organized with VM-based IPs and rely on automated backups so I can tinker without worrying.
Introduction
Welcome to a tour of my Proxmox home lab! In this post, I’ll walk you through all the services I run across my two-node cluster. Everything here is deployed using the excellent Proxmox Helper Scripts, which I rely on not just to spin up containers quickly but also to discover new services to experiment with.
After a fresh Proxmox install, I take care of the usual setup chores, such as disabling the enterprise repository and removing the subscription nag, before building my infrastructure. There is a script that does it.
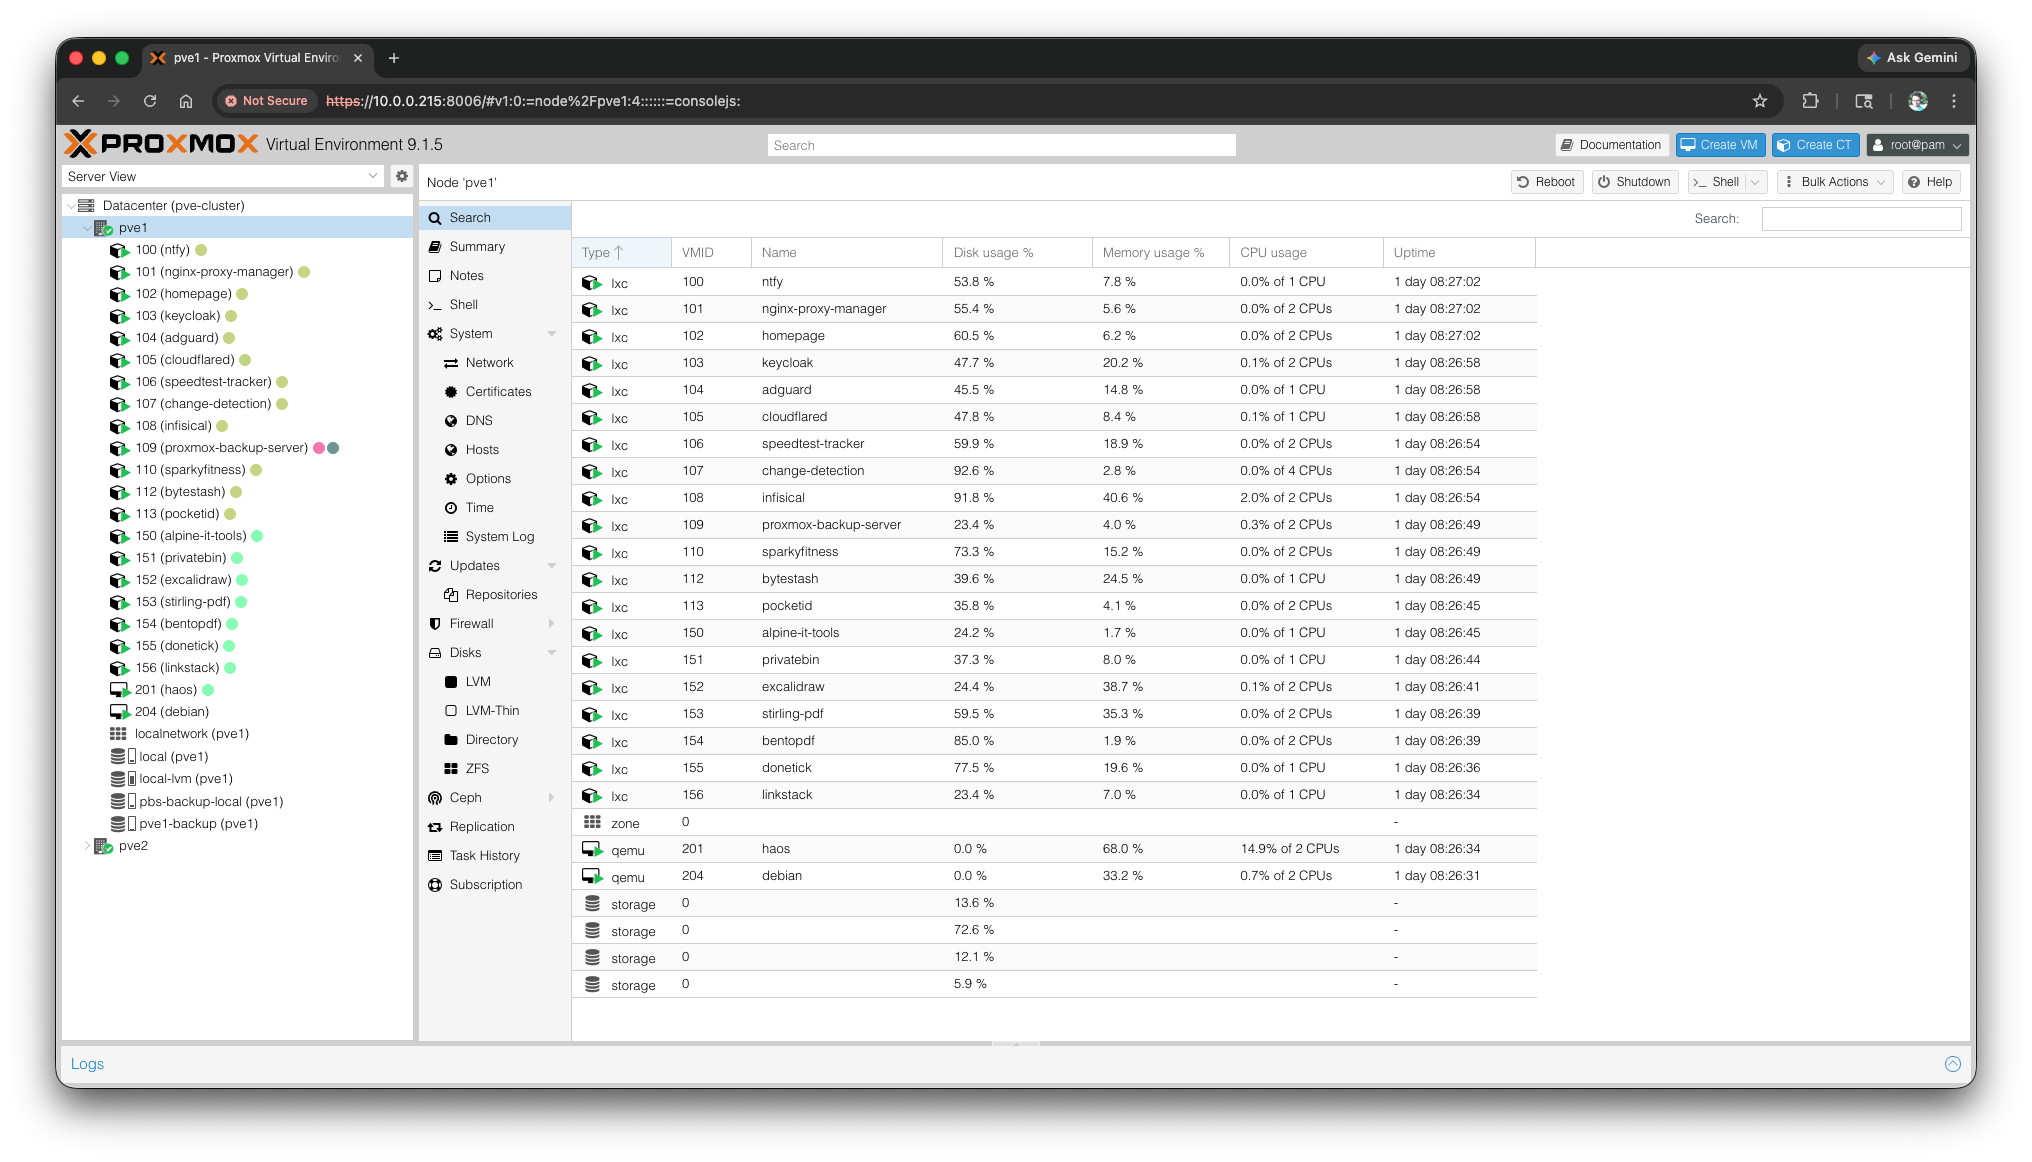
Node 1: Primary Services Hub
This is my main workhorse node, running production services and serving as a playground for new applications. To keep things organized, I follow a numbering system for VMIDs:
- 100–149: Internal services (private, not internet-facing)
- 150–199: Public-facing services
- 200+: Full virtual machines
The VMID also determines the container’s static IP. For example, VMID 100 becomes 10.0.0.100. This makes it easy to identify and manage everything at a glance.
Essential Services
Here are the services I rely on the most:
- Home Assistant – The backbone of my home automation setup
- OpenMediaVault – File sharing and storage management
- IT Tools – A collection of useful development utilities
- Uptime Kuma – Monitors service uptime and health
Beyond these, I also run various experimental services that are “good to have” when needed.
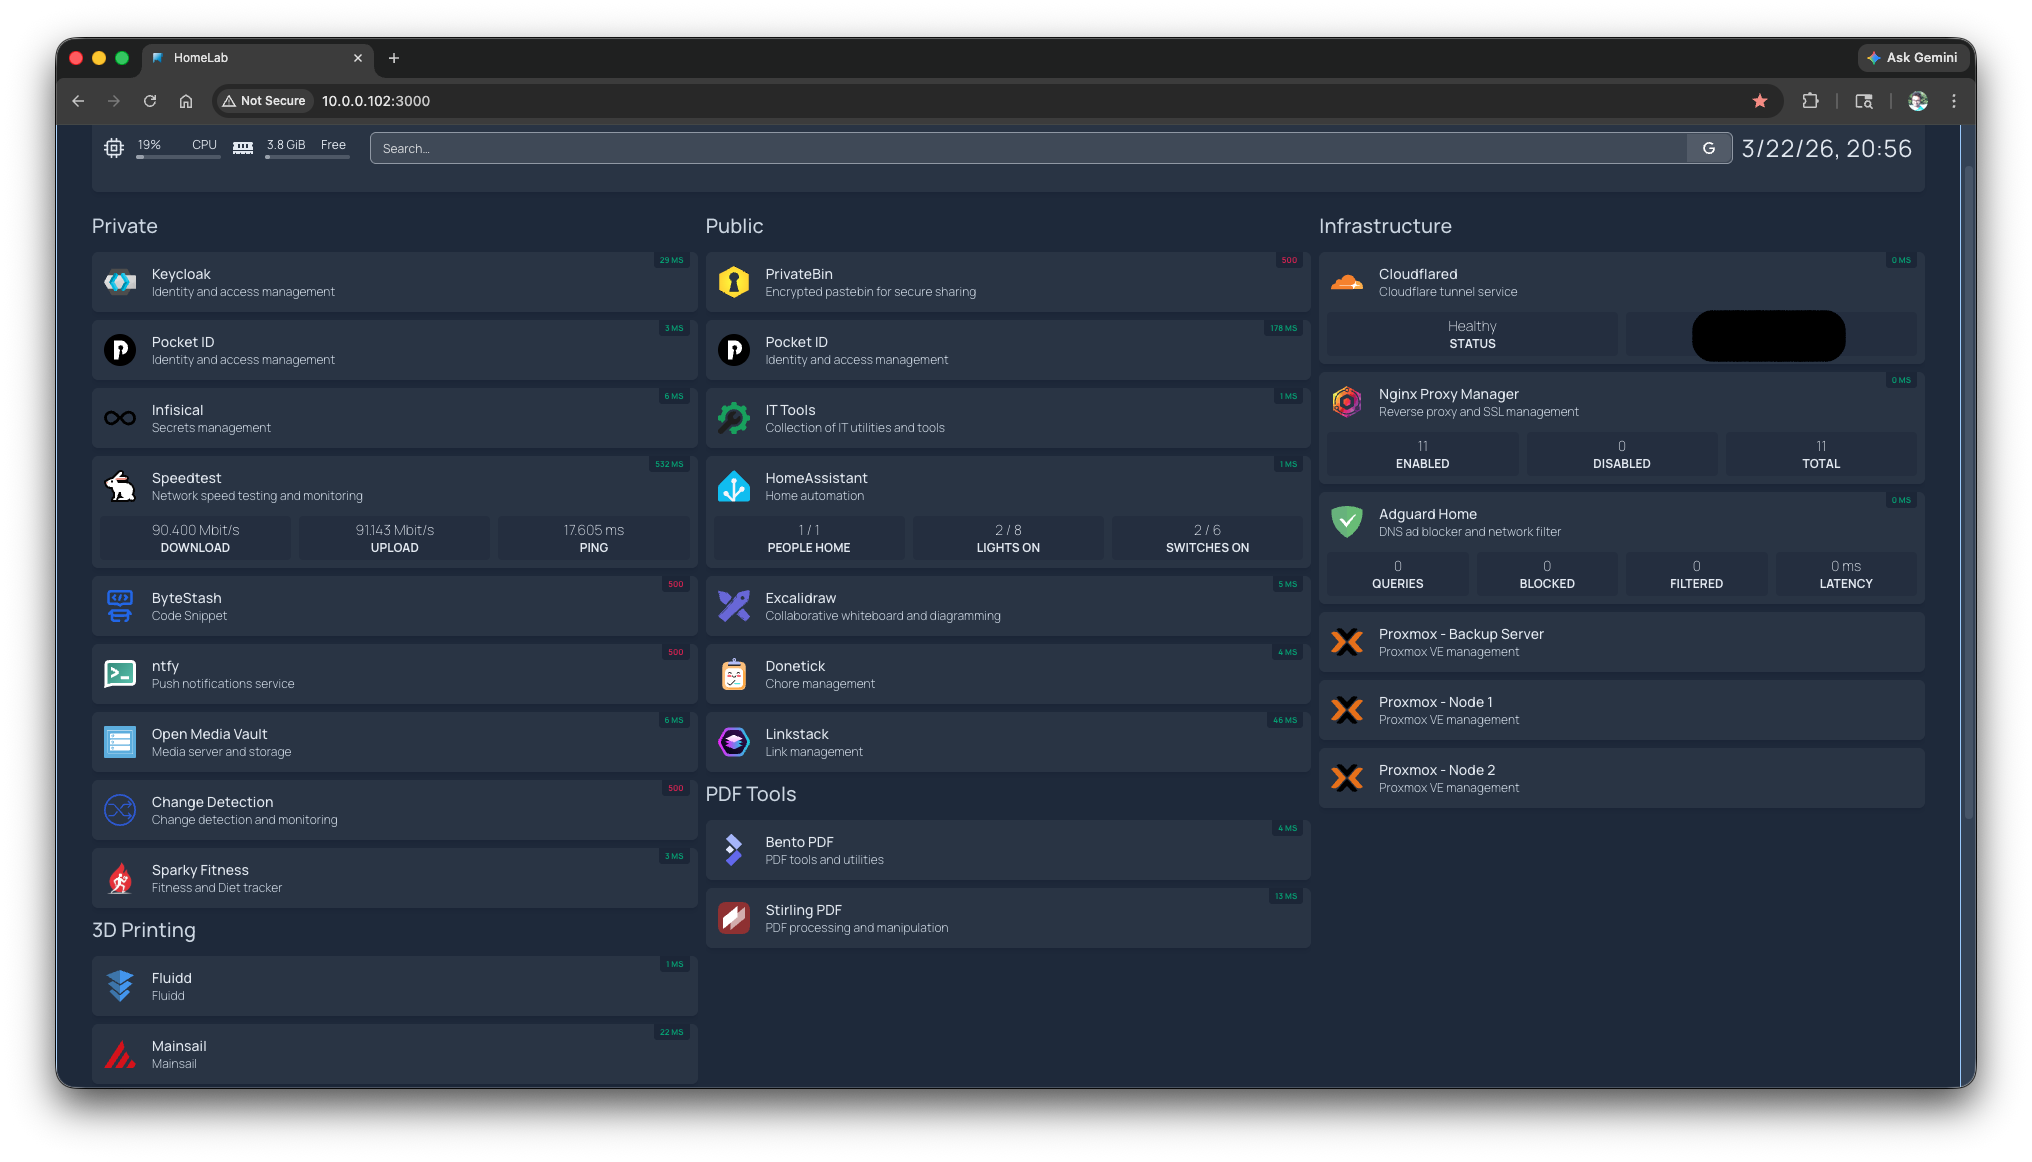
Centralized Dashboard
I use Homepage as my dashboard, providing quick access to all services while showing real-time status. It makes spotting issues instant and convenient.
Single Sign-On (SSO) Experiments
I’m exploring SSO for my lab. Keycloak is my current setup, but I recently discovered PocketID, which offers passkey-based authentication via OIDC. I’m still testing which option fits best.
Package Tracking
One fun automation I built uses Change Detection to track package deliveries. Here’s how it works:
- Create a monitor for the tracking page URL
- Check the page every 30 minutes during the expected delivery window
- Receive a Telegram alert the moment the keyword “Delivered” appears
This saves me from constantly refreshing pages and I know when my package arrives.
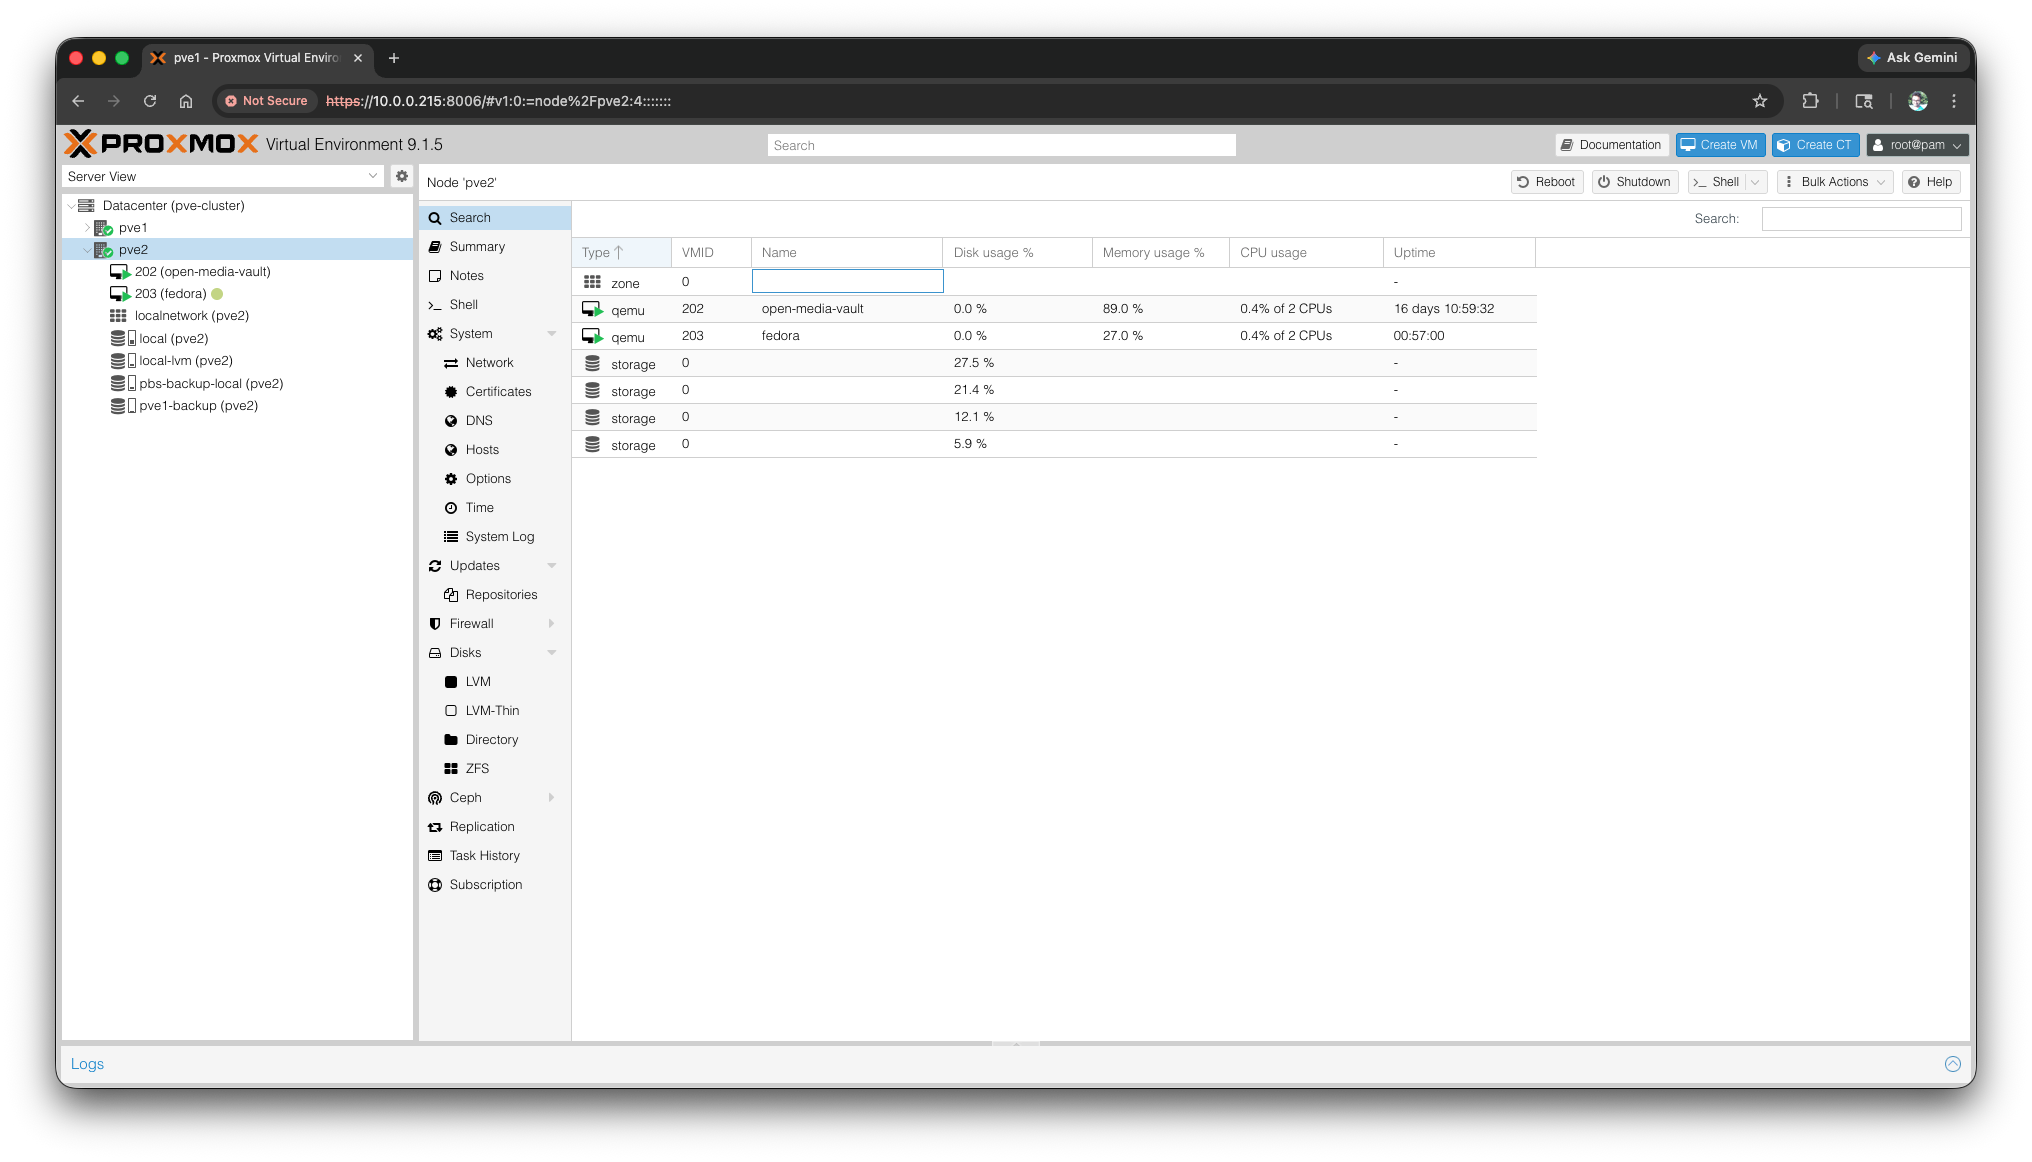
Node 2: Dedicated Storage & Fedora Testing
This node is purpose-built for storage. It runs OpenMediaVault with:
- A 1TB drive for storage
- A separate OS disk
Shared folders are accessible from both my laptop and Windows 11 workstation. WiFi works fine for everyday tasks, but for large file transfers, I connect via LAN to reach 100 Mbps. This node serves as my archive for important data.
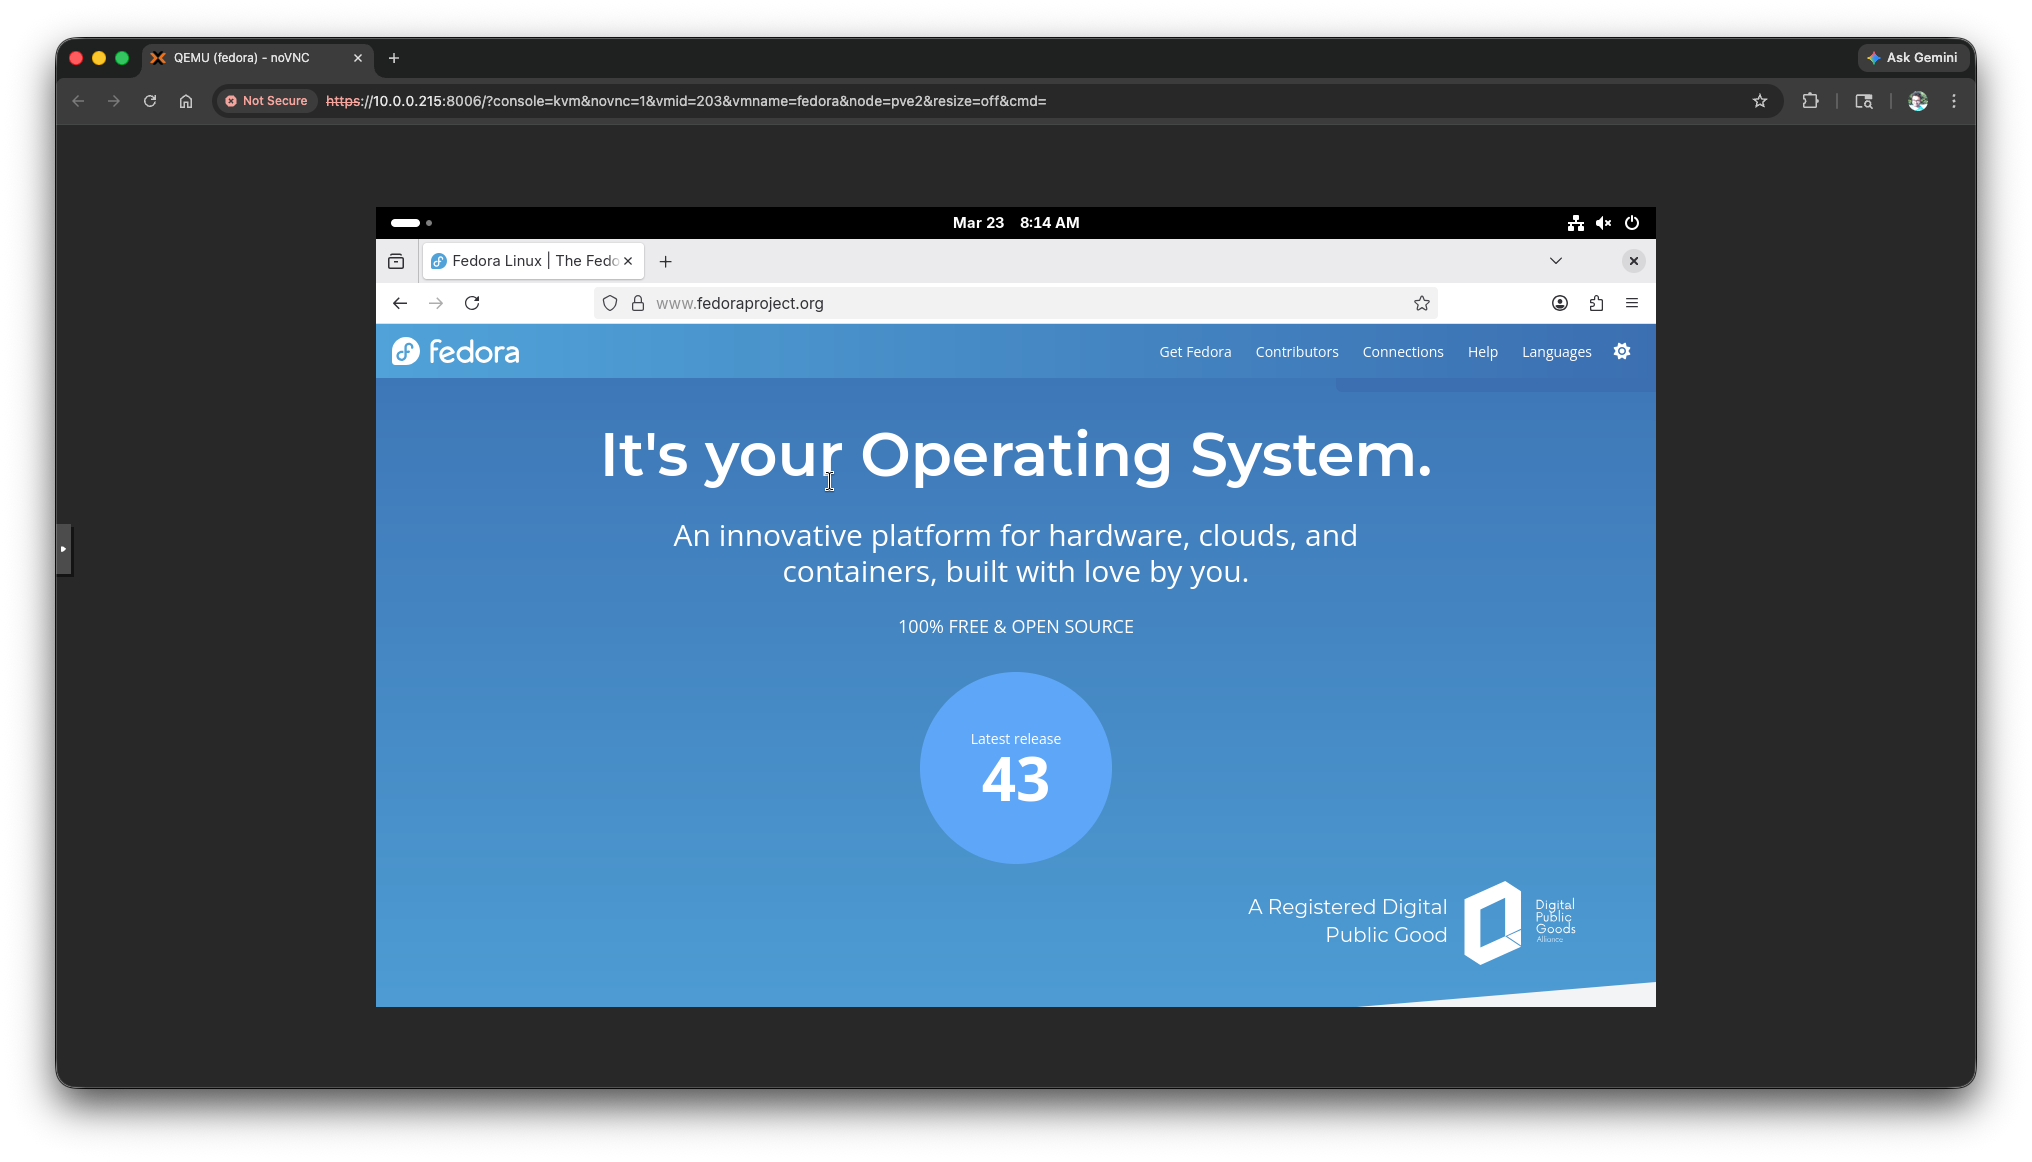
Fedora Workstation Playground
I also run a Fedora instance here to explore the latest updates. As a Red Hatter, it feels wrong not to.
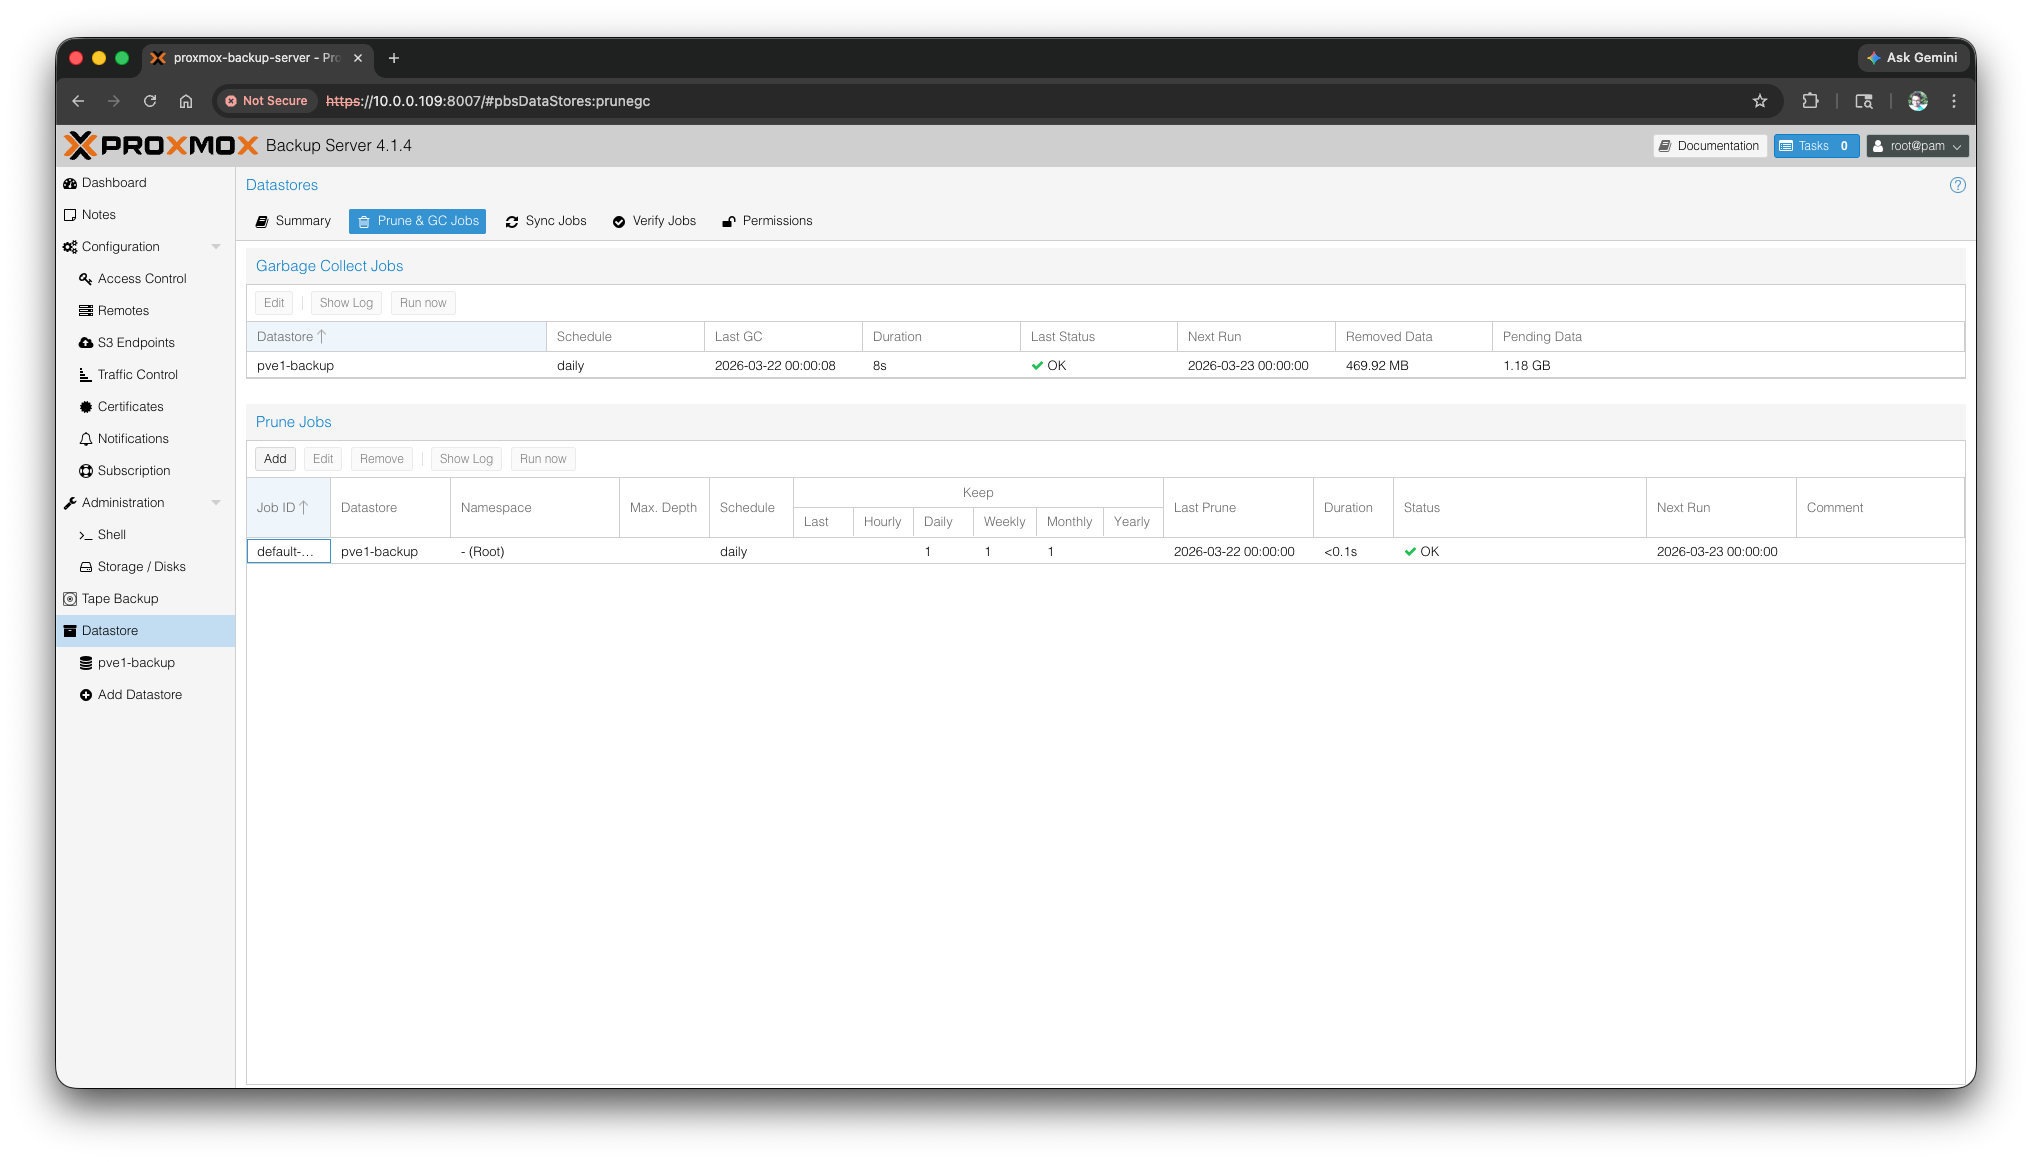
Backup Strategy: Safety First
Backups are critical. I use Proxmox Backup Server with the following setup:
- Schedule: Nightly incremental backups
- Retention:
- 1 daily backup
- 1 weekly backup
- 1 monthly backup
- Storage: Backups reside on the NAS-connected drive
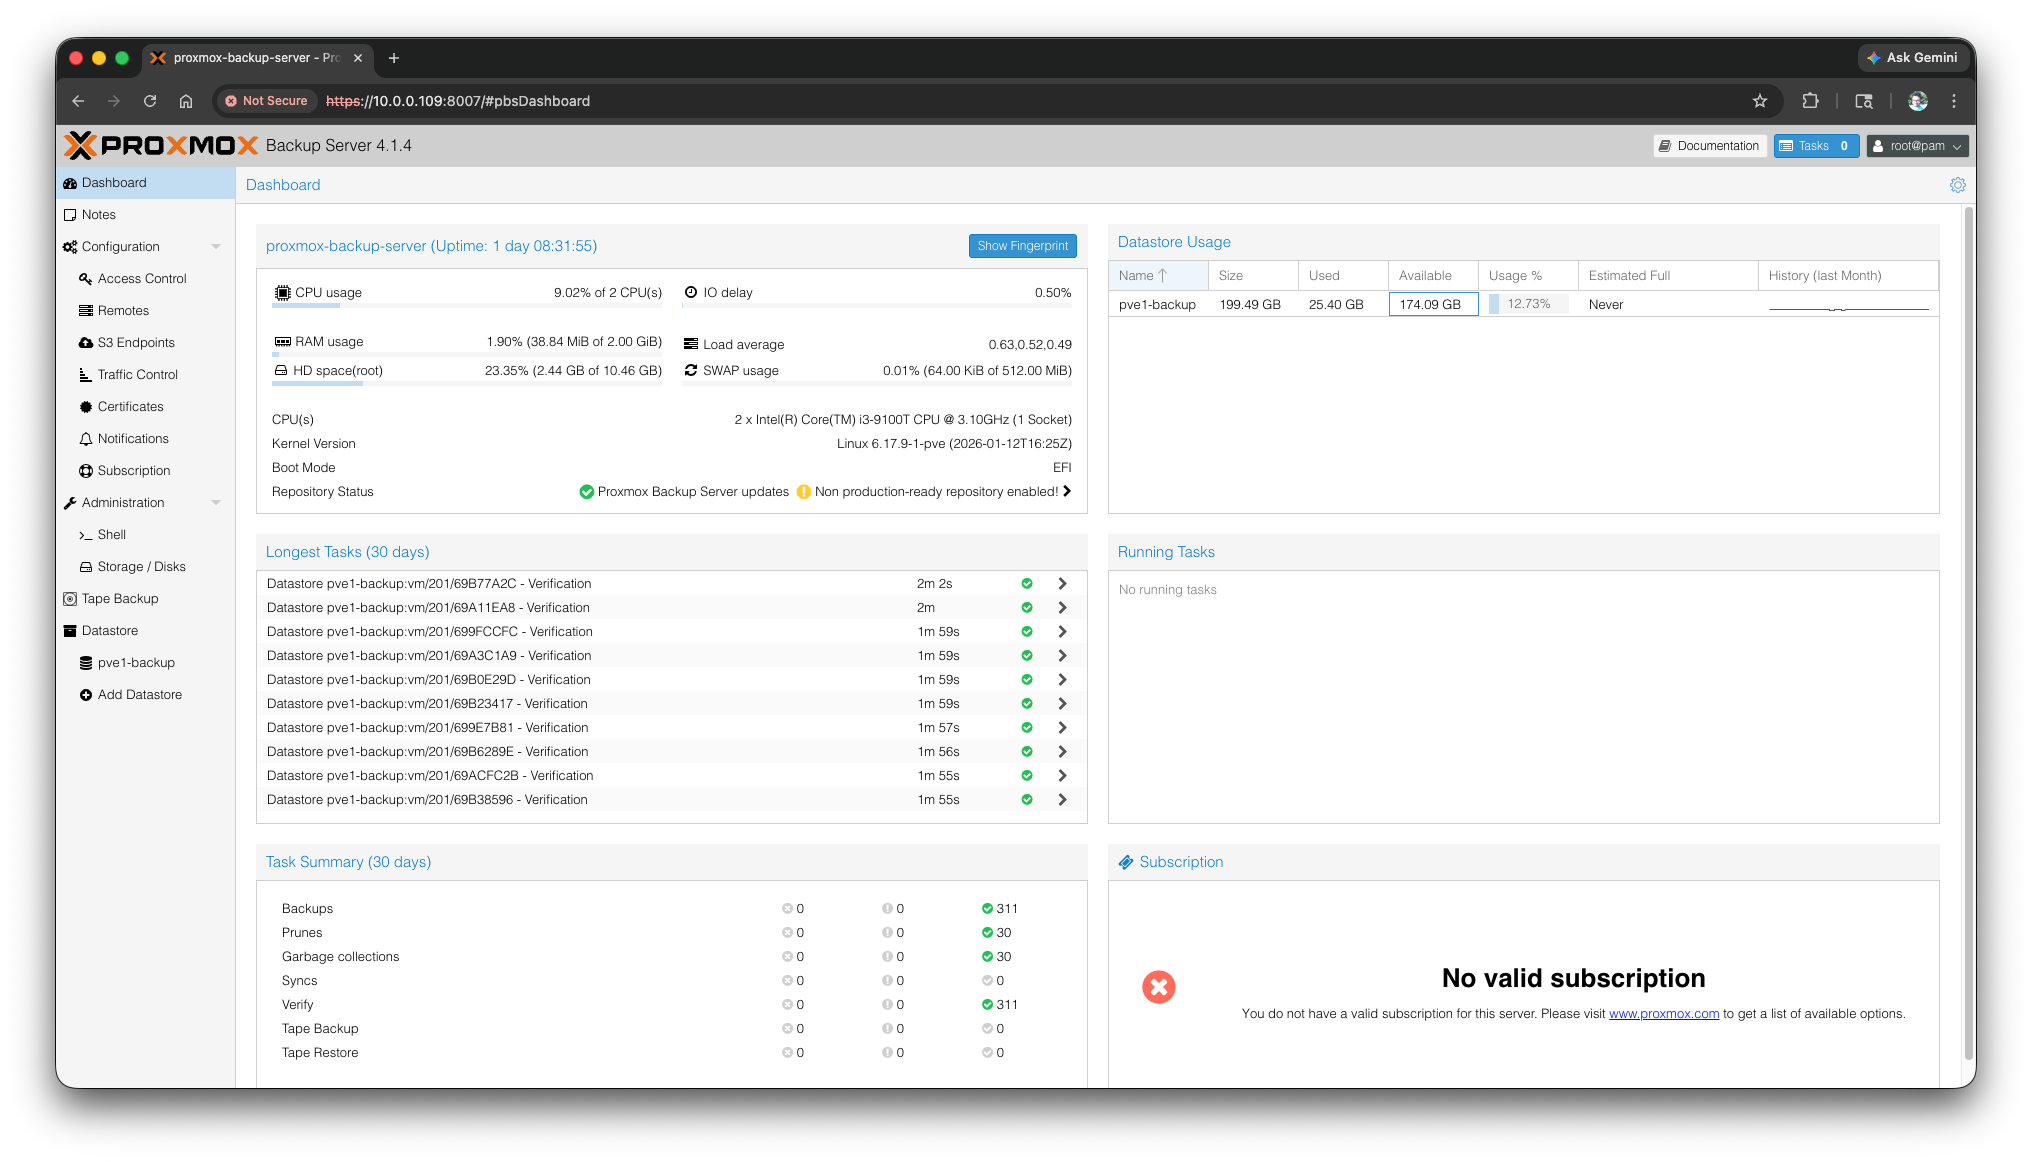
This approach provides multiple restore points, letting me roll back to any specific day, week, or month. Incremental backups save space while ensuring nothing important is lost.
Conclusion
From a single Raspberry Pi to a two-node Proxmox cluster, my home lab has grown into a bit more reliable setup now. The Proxmox Helper Scripts make service deployment easy and repeatable, while my backup strategy allows me to experiment without worry.
What’s Next?
In upcoming posts, I’ll be documenting:
- Home automation, where the real fun begins