TL;DR: Upgraded from a single Raspberry Pi to a multi-node homelab featuring 3x HP ProDesk Mini PCs and a Lenovo ThinkCentre, running Proxmox for virtualization with Tailscale VPN for remote access. One node serves as a Windows 11 Pro workstation, while the other two form a Proxmox cluster for running self-hosted services and NAS.
The Journey Begins
This is my second attempt at building a homelab. My first setup was a single Raspberry Pi running a few containers, but it quickly hit its limits. This time, I’m scaling it into a more structured setup and documenting the journey along the way.
The Hardware
Let’s go through the hardware. I sourced these before memory and storage prices saw a steep rise over the last 10 months. I was lucky enough to find most of these on Facebook Marketplace.
My Current Setup
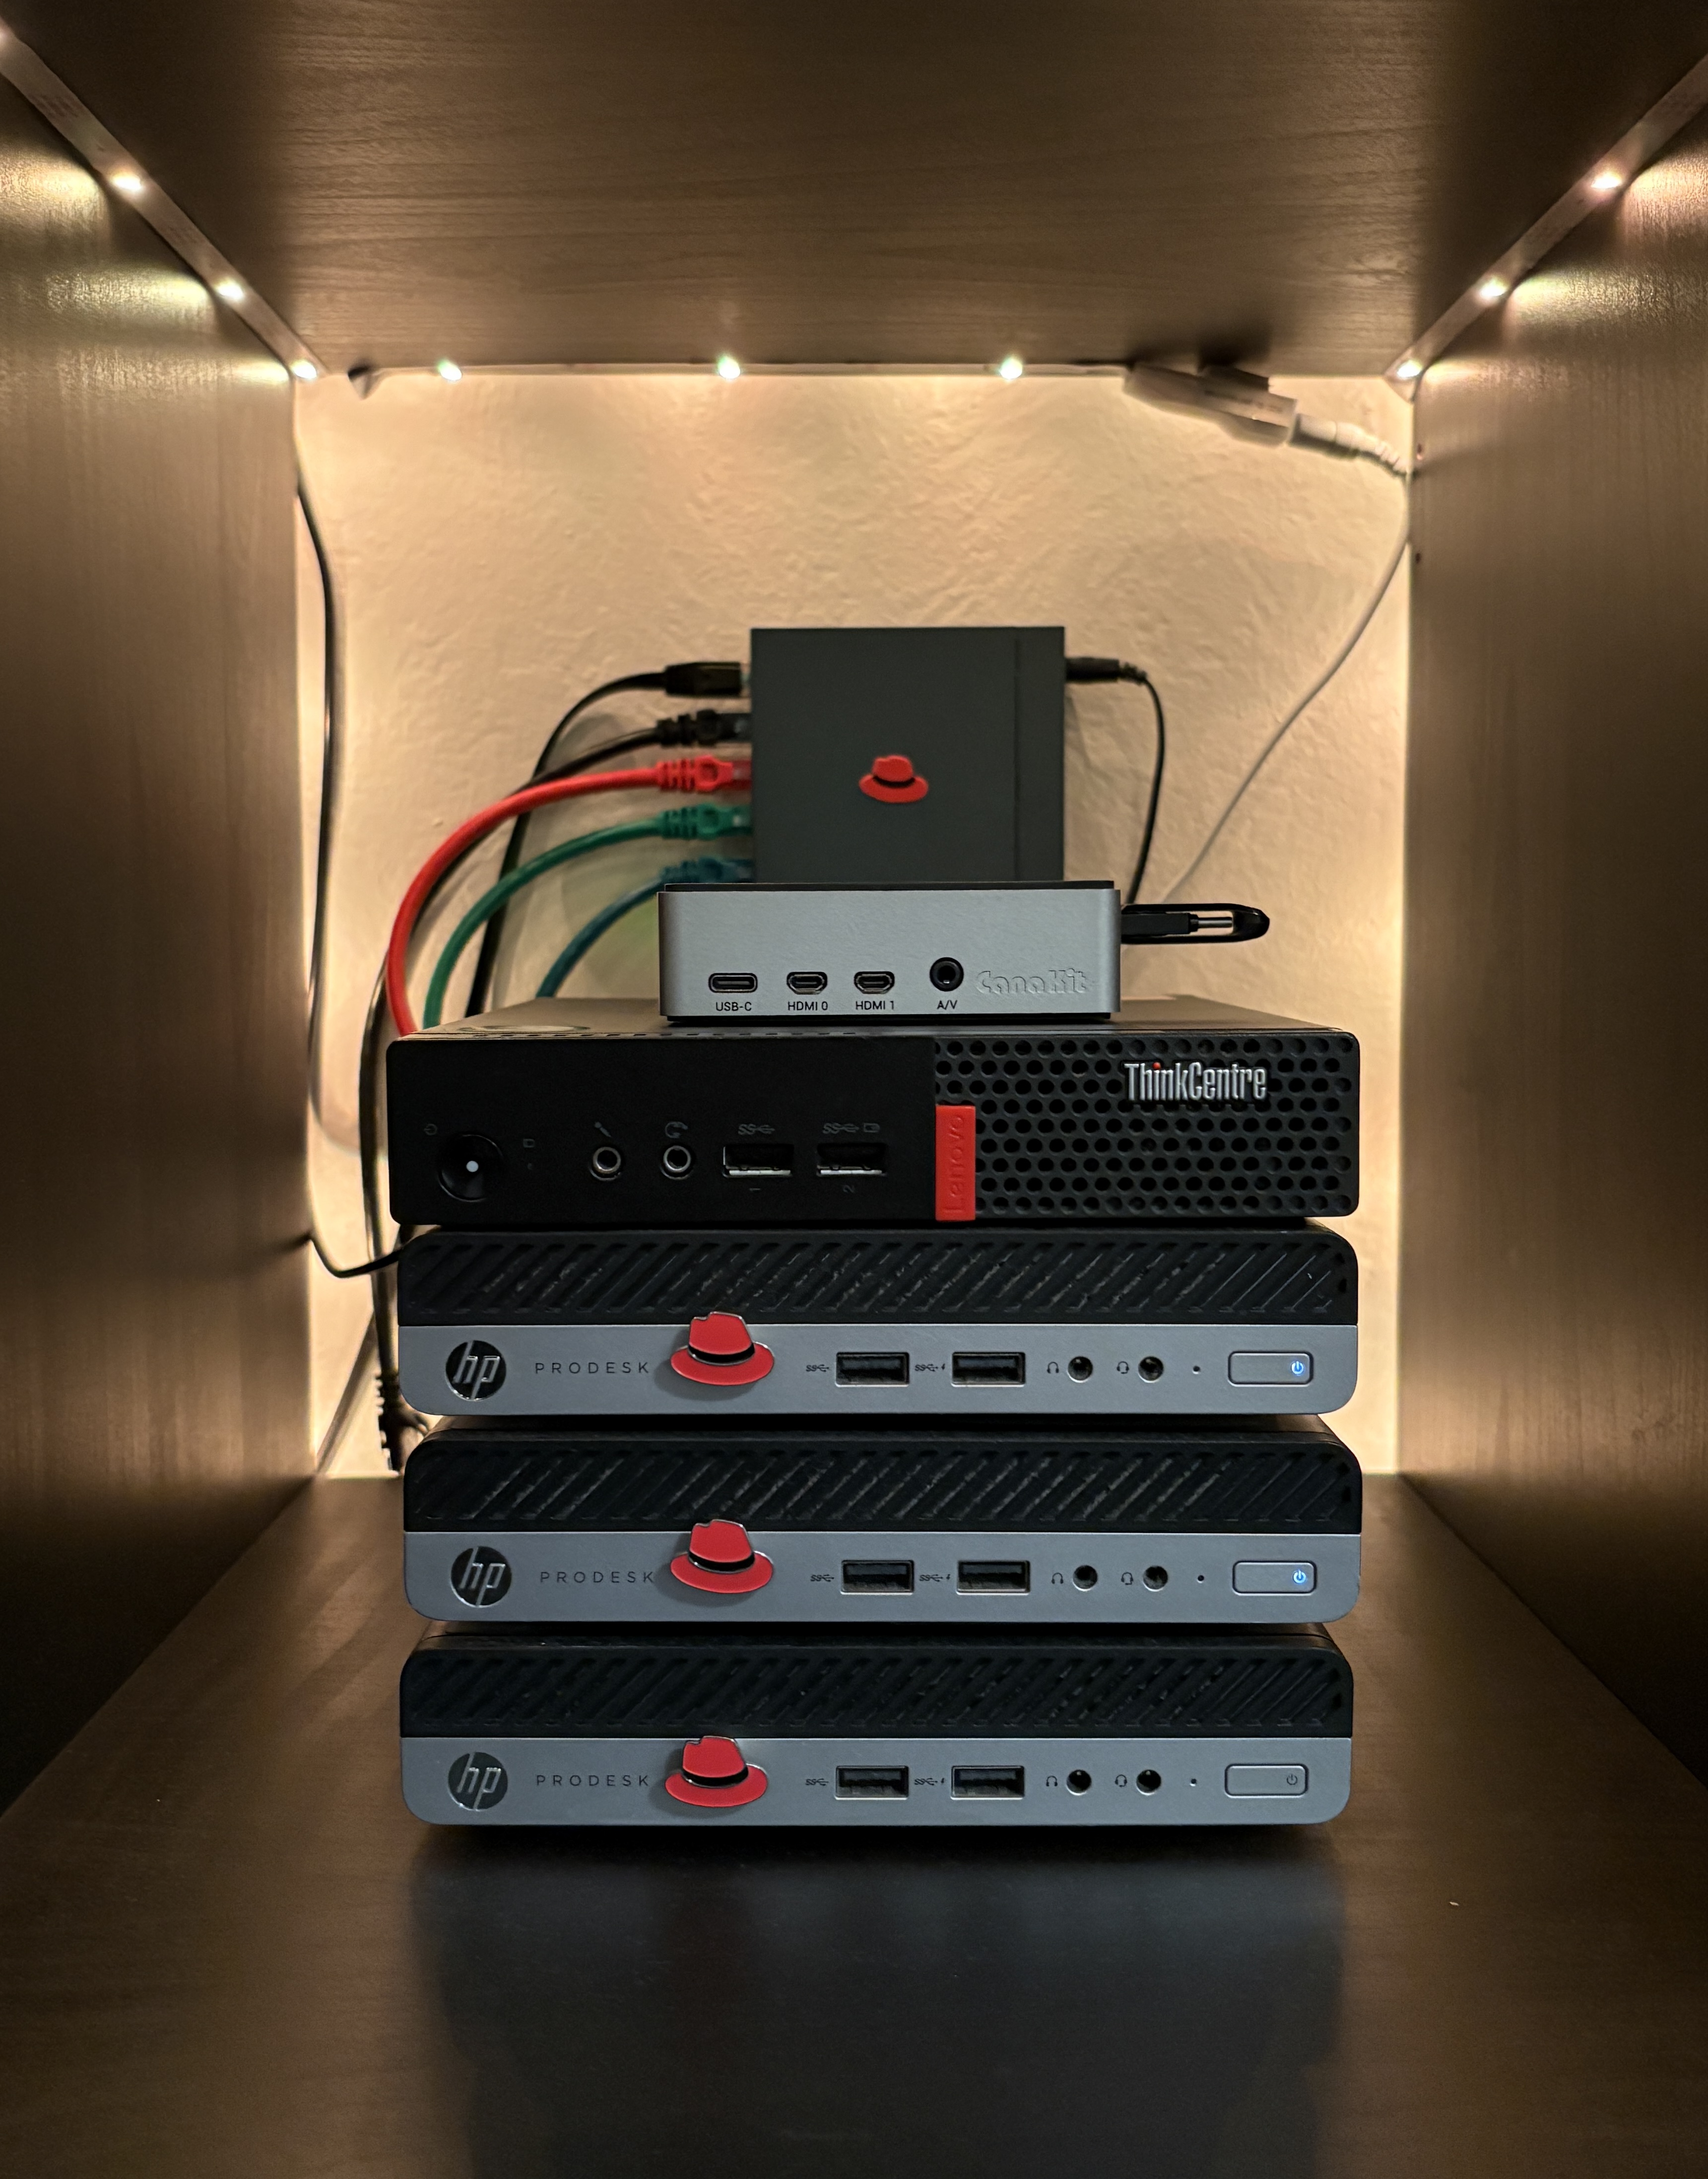
3x HP ProDesk 400 G5 Desktop Mini
- CPU: Intel Core i3-9100T @ 3.10GHz
- RAM: 8GB / 16GB / 20GB (varies by unit)
- Storage: 256GB to 1TB
1x Raspberry Pi 4 Model B
- CPU: Broadcom BCM2711, Quad core Cortex-A72 (ARM v8) 64-bit SoC @ 1.5GHz
- RAM: 8GB
- Storage: 64GB
1x Lenovo ThinkCentre M910q Tiny Desktop Mini PC
- CPU: Intel Core i7-6700 @ 3.40GHz
- RAM: 16GB
- Storage: 500GB

This is what a 1-liter mini PC looks like from the inside. It has two RAM slots, one 2.5-inch SATA bay, and one NVMe drive slot.
Setup Strategy
Machine 1: Primary Workstation (HP ProDesk)
I set up one of the HP machines as my primary PC, running Windows 11 Pro for day-to-day use. The Pro version allows remote access via Remote Desktop Protocol (RDP), so I don’t need to switch between display, mouse, and keyboard. I can access it from my laptop or even my phone.
When I’m away from home, I use Tailscale VPN to securely connect to my local network and continue working.
Advantages:
- Windows 11 Pro with RDP support
- Tailscale VPN for secure remote access
- Access from any device
Machines 2 & 3: Proxmox Cluster (2x HP ProDesk)
In my previous Raspberry Pi setup, I installed Ubuntu directly and ran a few containers on top. While it worked, A few instances where I had to restart from scratch when something broke at the OS level.
This time, I wanted a proper virtualization setup that could handle both containers and full VMs with better isolation and flexibility.
I chose Proxmox VE and installed it on both HP machines, connecting them into a small cluster. This allows me to manage both nodes from a single interface.
Why Proxmox over a standard Linux setup?
In my previous setup, if something broke at the OS level, I often had to reinstall the OS and manually set everything up again. While Docker helped, recovery was still time-consuming. With Proxmox, I can take snapshots of VMs and containers and restore them quickly.
Proxmox makes it easy to manage and restart machines through a UI without needing physical access.
Some services, like Home Assistant, offer better compatibility and more features when run as a full VM instead of a container.
Cluster Purpose:
- Node 1: Running and experimenting with self-hosted services
- Node 2: Dedicated NAS setup to separate storage from workloads
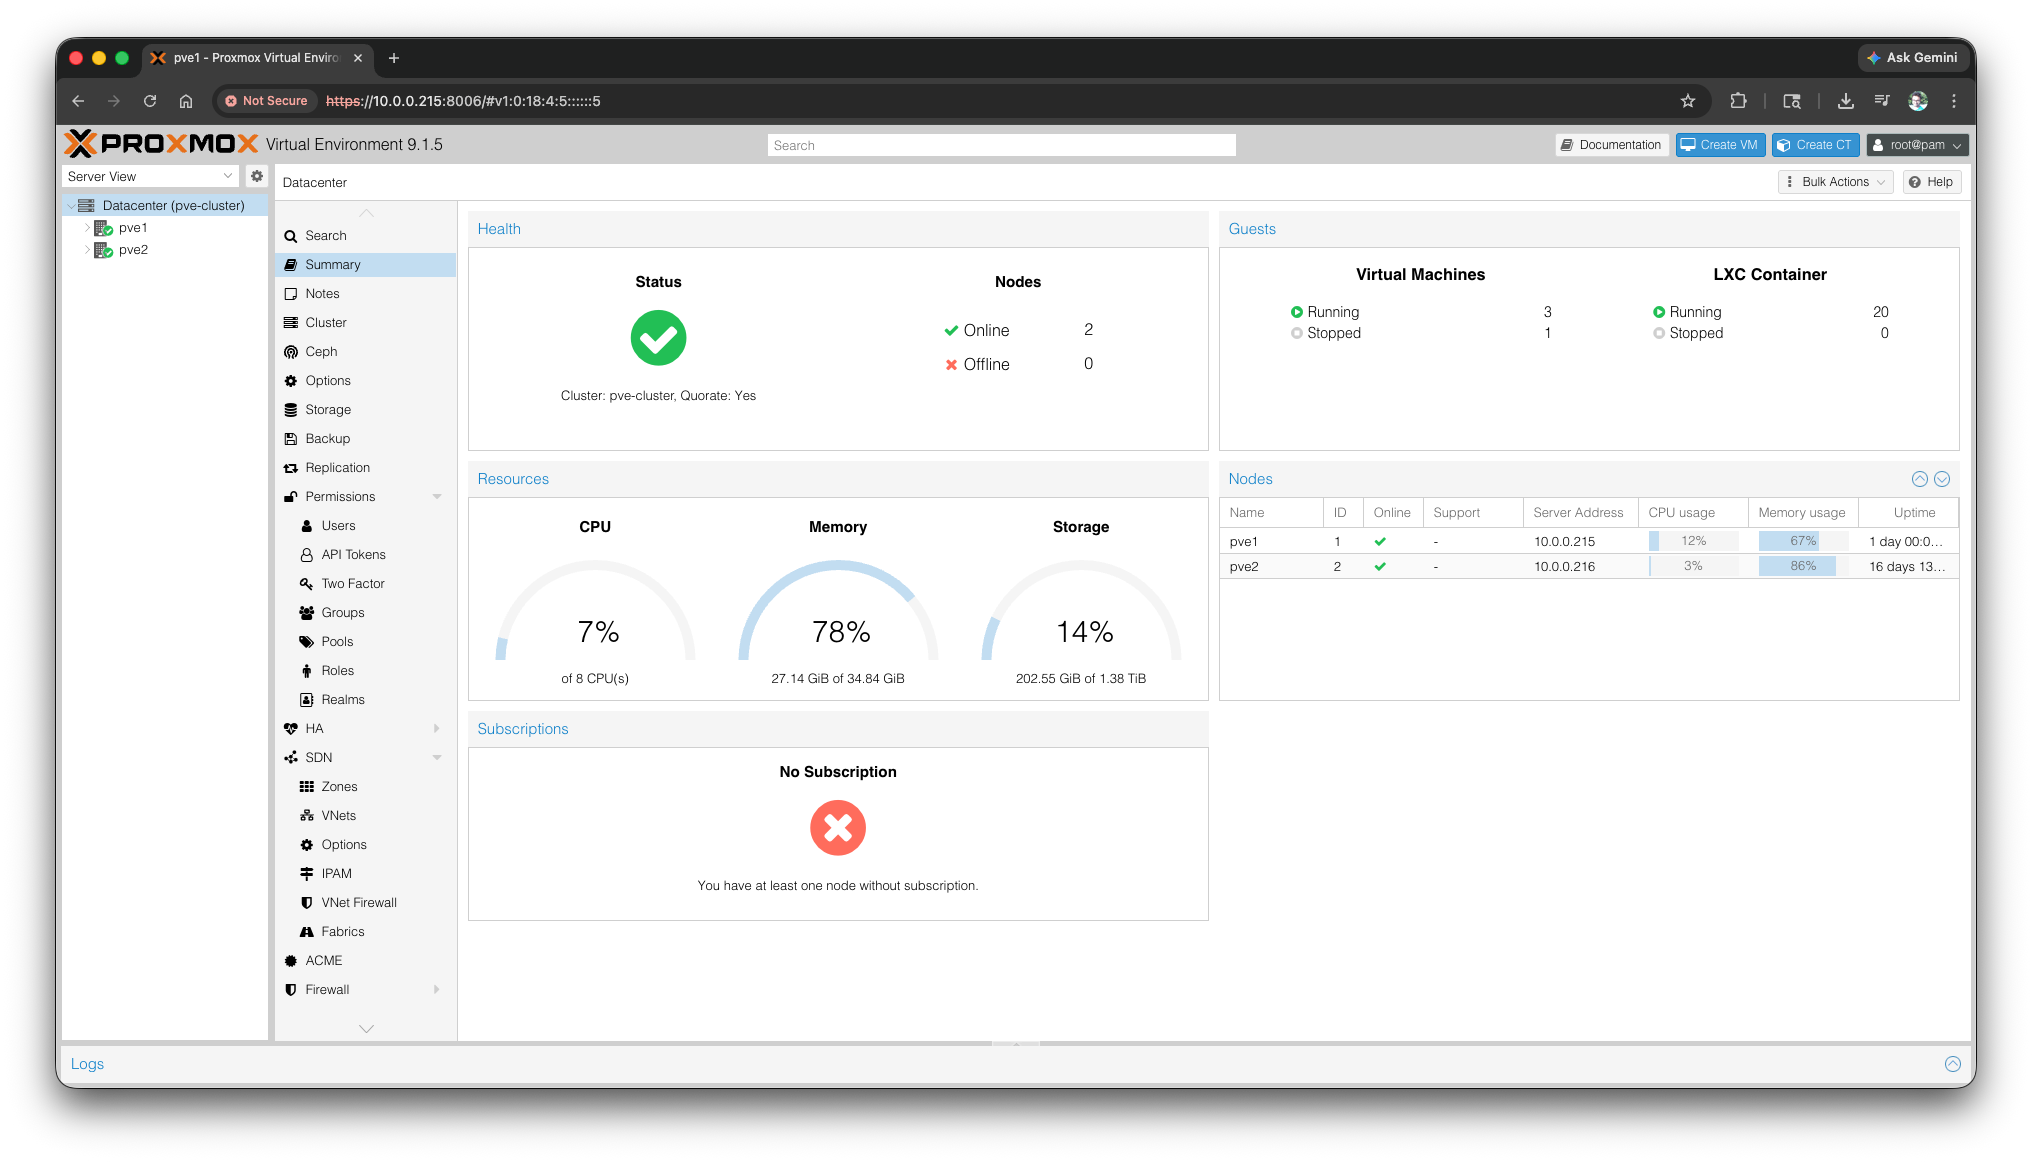
This dashboard shows both nodes in the cluster and gives a quick overview of resource usage and status.
Machines 4: (Lenovo ThinkCentre)
This is a spare hardware for now, I’ll figure out how to put it to use later.
Machines 5: (Raspberry)
Still TBD. Might turn it into a local DNS server.
What’s Next?
In upcoming posts, I’ll be documenting:
- Specific tools and applications I’m running